User Guide
Welcome to OpenNeuro! This guide is dedicated to new users to the site who would like to get started on using the OpenNeuro web platform to freely store and share Brain Imaging Data Structure (BIDS) datasets.
OpenNeuro is a data archive that follows the FAIR principles for data management, and which we hope can be a useful resource for your research projects. In this guide, we describe browsing, downloading, uploading and managing OpenNeuro datasets.
For additional guidance and motivation on reproducible neuroimaging research, we recommend the Open and reproducible neuroimaging guide and the ReproNim 5 Steps.
Signing Up
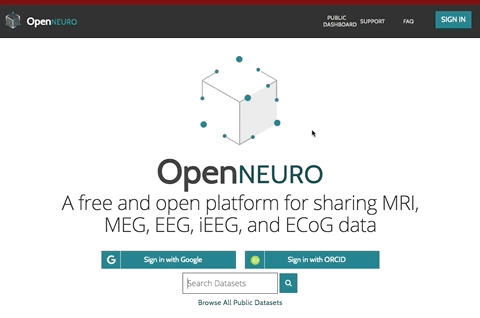
OpenNeuro does not require you to have an account to browse and download public datasets, but having an account does allow you to save those that interest you or to subscribe to them for email updates. Naturally, you will also need an account if you plan to store or manage your own datasets.
Signing up or signing in is easy with a Google or ORCID account. Simply hit the SIGN IN button in the top right of the page and choose your preferred account.
Next, we’ll take a look at the Public Dashboard and Dataset pages, including how to download a dataset. You can also skip ahead to uploading your own dataset.
Browsing Public Datasets
To access public datasets, click on the PUBLIC DASHBOARD button in the navigation bar at the top of the page.

On the Public Dashboard, datasets can be searched for by keyword or sorted by various criteria.
Visible from the dashboard are each dataset’s high-level stats and information. To access a dataset’s landing page, click on its name.

Viewing and Downloading a Dataset
A dataset’s landing page has four major sections: a toolbar, a version manager, the dataset’s information and files, and a comments section.
The Toolbar
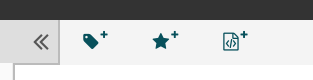
Located at the top of the page, the toolbar contains the following options (icons left to right):
Follow/Subscribe: Get email updates when a new version is posted.
Like/Save: Add dataset to your Dashboard under Saved Datasets.
View metadata: View data not necessarily contained within the dataset, including it’s DOI, OpenNeuro ID and URL, study type and design, number of trials, etc. This data helps make datasets searchable, and a compilation of the metadata of all datasets on OpenNeuro can be found at metadata.openneuro.org.
Datasets you own will have more items in their toolbar.
Dataset Versions
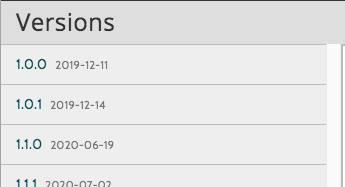
This section is located to the left of the dataset’s information.
Changes to dataset information are tracked in the dataset’s snapshots (versions). To view the dataset at a specific snapshot, simply select it from the Versions menu.
Dataset Snapshot
This is the main section of the dataset landing page, containing almost all of its information and files at the given snapshot. Here, you can:
View a dataset’s information (extracted from its README and description.json files).
View and download individual files. The file viewer supports the following file extensions: csv, html, txt, json, tsv, nii, and nii.gz.
Download the dataset via the browser.
View instructions for downloading it from S3, or via DataLad or the openneuro-cli.
View analyses of the dataset on BrainLife (if available).
Check the dataset’s BIDS validation status.
View the datasets git hash at this version.
Generate a citation.
Uploading Your Dataset
Once you’ve signed into OpenNeuro, you’ll be able to upload your dataset by hitting the button at the top left of the page. This will open a window guiding you through the four step process of adding the dataset to OpenNeuro.
There are a few things to keep in mind before uploading a dataset:
You must be the owner of the dataset and have the necessary ethics permissions to share the data publicly.
The dataset may not be subject to GDPR protections.
The dataset must follow BIDS specifications. Your dataset will be validated on upload, but if you want to check it for yourself, a web-based tool is available here, and a cli tool can be found here.
You will need to ensure that either all structural scans have been defaced (we recommend the pydeface tool) or that you have explicit participant consent and ethical authorization to publish without defacing.
You must be willing that the dataset becomes publicly available under the Creative Commons CC0 license upon publishing or after a grace period of 36 months from the date of its first snapshot creation.
The first upload prompt will ask you to select the dataset’s folder from your computer.
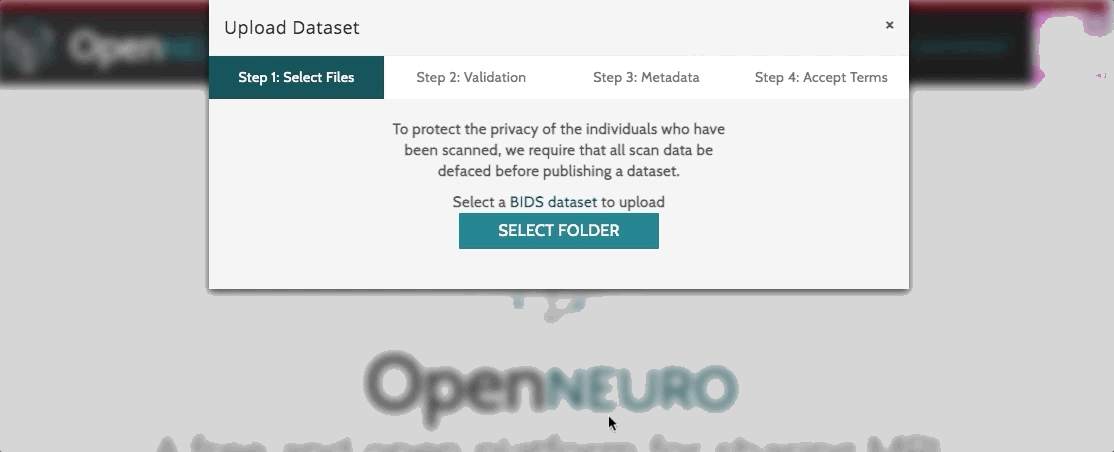
Once you’ve selected and uploaded the dataset, it will be checked by the BIDS validator. The dataset may be uploaded with warnings, but errors must be resolved before the upload can be finalized.
The next step is to fill out the metadata form, which contains information not accessible from the dataset itself and is used to facilitate search results. This is optional, but highly recommended.
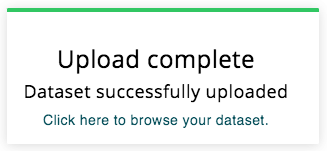
Finally, you will need to accept the Terms and Conditions and affirm that the data has been either defaced or given consent to be made public otherwise. Once you have done so, the dataset will begin uploading in the background and you’ll be free to navigate the site (but don’t reload it or close the window, or the process will be cut short). When the dataset has finished uploading, you’ll see a notification pop up in the bottom-right corner of the page.
Managing Your Dataset
Your dataset page will look very similar to the public dataset pages described earlier, with several key new features.
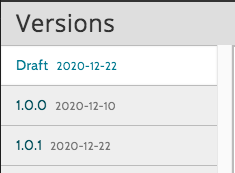
Draft is now available under the Versions sidebar. The draft page is where you can make edits to your dataset, published or not, without them being visible to the public.
The draft page information is nearly identical to the snapshot pages, the differences being that most information fields have an edit option and files in the Dataset File Tree have options to add, update, and delete them.

The dataset toolbar will have a few new items, including:
Publish: Make your dataset public. This will make it available under the CC0 license.
Delete: Permanently remove your dataset from OpenNeuro. If you are deleting the dataset to replace it, a redirect url can be submitted with the delete form.
Manage Permissions: Add collaborators to the dataset and manage their read/write permissions.
Create Snapshot: Create a new version of this dataset with changes made to Draft.
View and Edit Metadata: If you didn’t add the metadata on upload, you can fill it in here.
Advanced users may wish to manage their datasets by other means. OpenNeuro datasets and features are available through its GraphQL API, the openneuro-cli, DataLad, and direct git access.
Support Channels
If you’re running into complications, there are multiple means by which you can find a resolution.
To start, OpenNeuro has a FAQ page that might contain what you’re looking for.
If you’re running into problems of a less general nature, we highly recommend looking to NeuroStars for assistance. It is a public forum hosted by the International Neuroinformatics Coordinating Facility (INCF) and there you’ll be able to find experienced users of this and other related platforms.
Finally, users logged into openneuro.org can access the SUPPORT modal for issues regarding the site or a specific dataset.

As an aside, if you’d like to suggest a new feature, you can do so here.